Tuesday, January 29, 2013

A Future World BBQ Champion

Someone is getting a jump start on the competition! :)

Wednesday, November 7, 2012

Tuesday, July 10, 2012

Impress your Guests with Sliders

On Jul.10.12 , In Information, Recipe , by Paul Kirk

There is undeniable pleasure in a plain beef burger — juicy, tender, and well-browned over a backyard grill — but there’s even more enjoyment and flavor in a jazzed-up one. Try using new spices or different meats like lamb, duck, bison, chicken, or crab. You can even grind it at home using a grinder if you have one, or mince it in a food processor and continue by adding seasonings aggressively. Try the recipes below and you’ll be on your way to a summer full of great “small burgers” which are, in essence, sausages in burger form.


I entered a recipe for Australian ground lamb sliders in a contest last year and one of the individuals that did the follow up on the recipes asked me why I used sliders and not regular burgers. It was an easy answer: slider burgers, served on potato buns or dinner rolls, are a fun alternative to traditional-size hamburgers and that’s what backyard grilling is all about. You can impress your family and friends with some good food that is a little different than the main stream meal. If you’re a good burger griller, this is a no-brainer. It’s not really any more work and they cook faster. It also solves the problem when your Aunt Cora says that a large burger is too much for her to eat.

To really have a great outing that will impress your guests, grill up a variety of sliders. Some of my favorite sliders are not your everyday beef burger or sandwich, and you don’t have to use burger-shaped patties at all—they can be just small sandwiches.

Here are a few of my favorite slider recipes using bison, chicken, duck, lamb, and my favorite: crab.

Mini Bison Steak Burgers with Crispy Shallots

Crispy Shallots
  • 2 cups all-purpose flour
  • 1 teaspoon sea salt
  • 1 teaspoon freshly ground black pepper
  • 1 cup shallots, thinly sliced
  • 2 cups milk
Burgers
  • 1 1/2 pounds ground bison patties (80/20), 2 ounces each
Toppings
  • Salt and pepper to taste
  • 12 slices Camembert cheese, cut into 1/4-inch slices
  • 4 ounces crumbled Gorgonzola cheese
  • 12 mini potato buns (2-1/2 inch), split
  • 3 ounces unsalted butter, melted
  • 1 to 2 ounces arugula leaves
  • 24 slices canned pear slices in light syrup, drained
  • 4 ounces Steak Sauce of your choice
Soak the sliced shallots in milk for at least 1 hour or overnight in the refrigerator. Mix flour, salt and pepper in medium bowl. Drain the shallots, shaking off any excess milk, add shallots; toss to coat. Deep fry in 350º degrees F oil for 1 minute or until golden brown; drain.

Season bison patties with salt and pepper.

For each serving: Grill patties on medium-high heat 5 minutes on each side or to medium (160º degrees F), or desired doneness.

Top each burger with 1 Camembert slice and 1/4 ounce Gorgonzola; cook 1 or 2 minutes or until cheeses are softened.

Meanwhile, brush cut sides of 3 buns evenly with butter; toast lightly on griddle.
Top bottom half of each bun with 3 to 4 arugula leaves, about 1 ounce pears, 1 burger, 1 tablespoon shallots and 1-1/2 teaspoons steak sauce. Cover with tops of buns.
Makes 12 sliders.


Grilled Herbed Mini Chicken Burgers

  • 1 pound ground chicken, preferably boneless, skinless thighs
  • 1 small carrot, grated
  • 2 green onions, minced
  • 2 cloves garlic, pressed
  • 1 teaspoon dried parsley
  • 1 teaspoon dried basil
  • 1/4 teaspoon salt
  • 1/4 teaspoon black pepper
  • Small hamburger buns or potato rolls
Preheat grill for medium heat.
Combine ground chicken, green onions, carrots, garlic, herbs, salt and pepper together in a large mixing bowl. Shape mixture into 6 to 8 patties and place on wax paper.

Mixture will be soft. Place patties on lightly oiled grill rack and allow to cook for 12 to 15 minutes, turning once. When juices run clear, remove from heat and place on burger buns with favorite condiments.

Grilling Chicken: The grill gives chicken a great flavor that you just can’t get any other way. The secret is to keep the natural fats from the chicken from causing flare-ups and to get the chicken cooked to perfection without drying it out. You can do this with a good marinade and a watchful eye.
Makes 6 to 8 mini burgers

Crab-meat Sliders

  • 1/2 pound Dungeness crabs, shelled & cooked
  • 2 large eggs
  • 1/4 cup canola oil
  • 1/2 cup panko breadcrumbs
  • Juice of 1 lemon
  • 1 tablespoon spicy brown mustard
  • Pinch of allspice
  • Pinch of paprika
  • Pinch of chili powder
  • 2 tablespoons minced shallots
  • 1 tablespoon minced parsley leaves
  • Non-stick cooking spray
Whisk the eggs in a bowl. Add all the other ingredients to the bowl except the crab meat, then stir. Once combined, use kitchen gloves to add the crab meat to the bowl; then mix by hand. Shape into small patties, then refrigerate for 20 minutes.

Cook the patties: Heat the oil in a pan over high heat. Cook each slider for 2-3 minutes on each side.
Serve: Place sliders on small chipotle rolls. Add tomato, red onions, romaine lettuce, and honey Dijon dressing.

Herbed Lamb Sliders with Spicy Eggplant and Basil-Mint Aioli

  • 1 1/2 pounds ground Australian Leg of Lamb
  • 1/4 cup minced shallots
  • 1 tablespoon dried parsley leaves
  • 1 1/2 teaspoons ground rosemary
  • 1 teaspoon sea salt
  • 1 teaspoon fresh ground black pepper
  • 2 tablespoons extra-virgin olive oil
  • Basil-Mint Aioli (recipe follows)
  • 12 soft dinner rolls, dollar buns or potato rolls, split
  • 12 slices spicy eggplant (recipe follows)
  • 1/2 pound white cheddar cheese, shredded
  • 3 plum tomatoes, sliced (optional)
Preheat the broiler, grill or skillet to medium hot.
In a bowl, combine the ground lamb, rosemary, shallot, salt and pepper and oil and blend well; form into 12 patties.

Grill, broil or fry 2 to 3 minutes, turn and cook another 1 1/2 to 2 minutes for medium rare.
Meanwhile, spread the bottom of the roll with aioli, prepared eggplant slice, tomato and top with lamb burger, cheese, and top with bun and serve with fries or rings.

In a large skillet, heat 2 tablespoons olive oil over medium-high heat; add 6 patties and cook for 2 minutes, then flip and cook for 1 1/2 minutes more for medium-rare. Repeat with the remaining olive oil and patties.

Spread some mustard on the roll bottoms and arrange on a broiler pan; place a patty on each and top with the cheese. Melt the cheese under the broiler, about 30 seconds. Cover with the tomato slices and roll tops.
Makes 12 sliders.

Basil-Mint Aioli
  • 3 large egg yolks
  • 6 large cloves garlic, pressed
  • 6 basil leaves, chopped
  • 6 sprigs of mint leaves, chopped
  • 1 tablespoon fresh lemon Juice
  • 1/3 teaspoon sea salt
  • 1 cup olive oil
  • 3 tablespoons boiling water
  • Dash cayenne
  • Dash Worcestershire sauce
  • 1/4 teaspoon fine grind black pepper
Mix yolks, garlic, basil, mint, lemon juice, salt and pepper in a food processor. Blend for 3 minutes. Dribble oil in until it begins to thicken and incorporate; add the rest of the oil. Add in seasonings to taste. Finish with boiling water and refrigerate immediately.
Makes about 1 1/2 cups.

Roast Duck Sliders

    • 1-4 to 5 pound duck, fresh (or thawed if frozen), or duck breast
    • 1/2 yellow onion, peeled & halved
    • 3 large cloves garlic, peeled
    • 1/2 orange, washed & halved
    • Some fresh sprigs of thyme, rosemary and sage
    • Extra Virgin Olive Oil
    • Sea salt and fresh cracked black peppercorns
    • 6 slider buns
    • A bunch of fresh arugula
    • Chutney
    Preheat your oven to 300º F and get out a roasting or baking pan and a rack that fits inside it to keep the duck off the bottom of the pan and out of its own fat.

    Rinse the little guy off and make sure you take out any innards. Then pat dry with paper towels.

    Lightly oil the outside of the bird with some olive oil. Salt and pepper both the inside as well as the outside of the duck generously. Stuff with the onion, garlic, herbs, and orange and tie the legs together (it’s called Trussing).

    If you’re using duck breast, cut a checkerboard pattern in the skin side just down to the meat, not into it. Oil both sides and season with salt and pepper. Grill skin side down over hot coals for 5 to 7 minutes turn and cook another 4 to 5 minutes to medium rare or to your desired doneness.

    When the duck is cooked and you pull him out of the oven to sit, you can prepare your slider buns:

    Toast the buns, on your BBQ grill, but if you don’t have one, you can broil them in the oven. For BBQ: Set the heat to medium and gently baste the insides of the buns with a little olive oil and place face down on the grill. Close the lid, but watch them! They burn quickly. Once toasted, remove to cool. If broiling, do the same; only lay them face up so the heat hits the insides of the buns.

    Assemble the sliders, lay some arugula down, a decent amount of duck, and top with the chutney.
    Makes 6 sliders.

    An easy way to form sliders is to use an ice-cream scoop or just divide the ground meat into 2 ounce portions or meatballs, and place them on a piece of plastic wrap or wax paper. Cover the meatballs with another sheet of plastic wrap, and using a lid off of a large spice jar or pint jar, top and push down to form your sliders. If, after formed, they are too tall or small, wet your hands and press them out to the size you desire.

    Grill over medium hot heat on a well-oiled grill so the sliders don’t stick. Grill to desired doneness and serve with the toppings you desire.

    To see the original article click on the link: http://www.grillingishappiness.com/information/impress-with-sliders/

Tuesday, June 26, 2012

RECIPE BLITZ


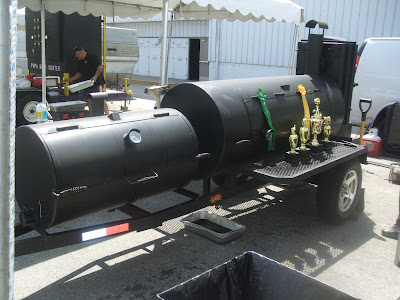
Some people insist on a lot of fancy equipment to make great barbecue, but they’re wrong. I should know: Since I entered my first barbecue contest in 1981, I have won more awards than I can count (maybe more than 625 of them), and when I compete, I use a $6,000.00 custom-designed cooker. But to make competition-worthy barbecue at home, you need only a basic kettle grill, a chimney starter and a cooking thermometer.

When I started competing, I didn’t want to share my secrets. At 2 a.m., I’d be at my pit with a penlight in my mouth to hide my work. But other competitors would wake up to watch. Now I conduct master classes, and I don’t win as many contests because my students beat me. I continue to compete because I love great barbecue: slow-cooked, tender, moist and packed with intense flavors. One student, Andrew Fischel, convinced me to help him open RUB (Righteous Urban Barbecue) in New York City in 2005. We’re not the only ones who love great barbecue.

Whether you’re a pro or a beginner, the technique is the same: low and slow. Compared to grilling, which means cooking quickly over high heat (400° to 450°), barbecuing takes four times as long and almost half the heat (anything below 250°).

Choose your fuel wisely. If you are new to barbecuing, use plain charcoal briquettes, because they burn more consistently and evenly than hardwood lump charcoal, which comes in many different sizes. I start the fire with 50 briquettes—and I am so fussy as to actually count them. Light them in the chimney starter, not with kerosene, or else your meat will taste only of fuel.
The cardinal rule of barbecue: Don’t peek into the cooker unless you have to. Open the lid only to turn the meat, baste it or add more fuel.


Grandma Kirk's Baked Beans

2 pounds dried navy beans, soaked overnight in cold water and drained

1 onion, coarsely chopped

1 garlic clove, minced

3/4 cup light molasses or sorghum syrup

3/4 cup light brown sugar

1 tablespoon soy sauce

1 1/2 teaspoons salt

1 teaspoon Worcestershire sauce

1/4 teaspoon dry mustard

1/2 pound slab bacon in one piece

Burnt Ends
Barbecued Brisket and Burnt EndsPut the beans in a large enameled cast-iron casserole and add enough water to cover by 1/2 inch. Bring to a simmer and cook until the skins on the beans curl up when you blow on them, about 30 minutes.

Preheat the oven to 300°. Stir the onion, garlic, molasses, brown sugar, soy sauce, salt, Worcestershire and mustard into the beans, then nestle in the bacon. Cover and bake for 3 hours, until the beans are tender, stirring occasionally and adding water as needed to cover the beans by 1/2 inch.
Stir in the Burnt Ends (if using), then bake the beans uncovered about 1 1/2 hours longer, until richly browned on top. Remove the bacon piece, chop into cubes and return to the beans before serving.
The baked beans can be refrigerated for up to 3 days.


Barbecued Brisket and Burnt Ends

 Mop

2 cups beef broth or low-sodium consommé

1/2 cup cider vinegar

1/2 cup Worcestershire sauce

4 garlic cloves, smashed

1/4 cup grated onion

1 bay leaf

1 teaspoon kosher salt

1 teaspoon freshly ground pepper

Slather

1/4 cup Dijon mustard

2 tablespoons pickle juice (from a jar of dill pickles)

1 tablespoon dark brown sugar

1/2 tablespoon Worcestershire sauce

3/4 teaspoon hot sauce

Rub

2 tablespoons granulated sugar

2 tablespoons light brown sugar

2 tablespoons smoked sweet paprika

2 tablespoons garlic salt

1 1/2 teaspoons onion salt

1 1/2 teaspoons pure chile powder

1 1/2 teaspoons freshly ground pepper

1 teaspoon celery seeds

1/2 teaspoon ground cumin

1/4 teaspoon cayenne pepper

1/4 teaspoon dried thyme

1/8 teaspoon dried oregano

One 9-pound whole packer beef brisket, fat trimmed to 1/4 inch

Light 50 charcoal briquettes using a chimney. Run the wand of a thermometer through a cork and use the cork to plug one of the air vents in the grill lid. Leave the remaining lid vents open and adjust the lower vents as needed (if the fire gets too hot, close the vents; too cold, open them).

Combine the ingredients in a small saucepan and bring to a boil. Simmer over low heat for 10 minutes. Strain, cool and transfer to a spray bottle.

Mix the slather ingredients in a bowl. In another bowl, combine the rub ingredients.

Put the brisket on a large rimmed baking sheet and coat it with the slather. Sprinkle the rub all over the brisket.

When the coals are hot, push them to one side of the grill and set a drip pan half-filled with water on the other side. Using tongs, transfer 4 of the hot coals to the chimney to light an additional 25 briquettes. Set the brisket on the grill grate over the drip pan, fat side up, with the widest end facing the coals. Cover and cook for about 5 hours, maintaining a steady temperature inside the grill of 250° to 275° (add more lit coals, 25 at a time, every hour or so, as needed). Spray the brisket with the mop every hour.

After 5 hours, carefully flip the brisket and rotate it 180° so the opposite end is now facing the coals. Cover, then cook for 2 hours, spraying every hour with the mop and adding more hot coals to the grill as necessary.

Flip the brisket and rotate it 90°. Spray with the mop again, cover and cook for 1 1/2 hours. Flip the brisket a final time and rotate it 180°. Spray with the mop, cover and cook for about 1 hour longer, or until an instant-read thermometer inserted into the thickest part registers 185°.

To make the Burnt Ends, transfer the brisket to a carving board and cut off the point, slicing through the layer of fat that separates it from the brisket. Return the point to the grill. Spray it with the mop, cover and cook for 1 hour, or until the meat is almost black on the outside.

Transfer the point to the carving board and let rest for 15 minutes. Slice into cubes and serve, or save for making. Thinly slice the brisket against the grain. Serve with Kansas City-Style Barbecue Sauce on the side.

Kansas City-Style Barbecue Sauce

3 cups ketchup

2/3 cup dark brown sugar

1/2 cup water

1/2 cup white wine vinegar

1/2 cup tomato paste

2 tablespoons yellow mustard

2 tablespoons pure chile powder

1 tablespoon freshly ground pepper

1 teaspoon salt

1 teaspoon granulated onion powder

1 teaspoon granulated garlic powder

1/2 teaspoon ground ginger

In a medium saucepan, combine all of the ingredients and bring to a boil over moderate heat. Reduce the heat to low and simmer the sauce for 30 minutes, stirring often to prevent scorching.

Monday, May 7, 2012

Winners of the 2012 UMB "Smoking in the Vault" BBQ Contest


This past weekend UMB Bank hosted its' 7th annual "Smokin in the Vault" bbq contest, held on the grounds of the Kemper Arena, home of the prestigious American Royal bbq contest. This contest brought in 29 competitors from Arizona, Colorado, Illinois, Kansas, Missouri, Nebraska, and Oklahoma, all bank employees and many that compete in sanctioned KCBS contests on a regular basis.

Each cook on our team was invited by Monty Spradling to take part and compete as "VooDoo BBQ".  The team members were comprised of Billy Rodgers of "Big Billy's BBQ", Jay "Snail" Vantuyl of "Snail Slow Smokin" bbq team, Monty Spradling and myself. We cooked on a brand new Lang 84 with a Char-Grill and built in warming box. The Lang was up for the challenge of providing championship bbq by maintaining long burn times, even temperatures, clean blue smoke, and enough capacity to feed a small army.

Our evening began with Billy Rodgers grilling 20lbs of chicken for the general public to raise money for a charity fund raiser. I was so impressed by the flavor of the grilled chicken that I made the decision to have Billy grill our competition chicken for turn in the next day.

Each team member cooked a specific meat/category to be turned in for judging. Our briskets, pork and chicken were smoked and grilled on the Lang 84 and Char-Grill. The ribs were cooked on one of Snails custom built upright barrel smokers.

To say the least, we were like a well oiled machine on the day of turn in's and the judges agreed with me. Our chicken came in third place, our ribs came in fourth place, our pork came in sixth place and our brisket came in first place (Thanks Billy), with us becoming Grand Champions and winning the contest!

What a great weekend to cook with great friends on an excellent cooker for a worthwhile charity!


Our third place chicken


Our fourth place ribs


Our sixth place pork


Our first place brisket


VooDoo BBQ (from left to right) Monty Spadling, Paul Kirk, Billy Rodgers and Jay "Snail" Vantuyl

Saturday, March 31, 2012

Lang Smokers

Sunday, March 18, 2012

Tofu isn’t taboo


By MARY G. PEPITONE
Special to The Star
Photo by TAMMY LJUNGBLAD

Kansas City’s own Baron of BBQ, chef Paul Kirk, doesn’t always ask, “Where’s the beef?”
A charter member of the Kansas City Barbeque Society more than 25 years ago, Kirk has won more than 475 cooking and barbecuing awards and has written numerous cookbooks. Sure his latest collaborative cookbook (see previous page) is all about ribs, but that doesn’t mean tofu or veggies are taboo.

In fact, at an international barbecue competition in Ireland more than two decades ago, Kirk took the grand champion prize in the newly founded vegetarian category. His entry included an onion blossom, grilled eggplant with garlic and grilled Irish spuds.

“I like grilled vegetables, and interest in how to prepare them has certainly grown since the start of KCBS,” he says. “At a recent event, I was barbecuing and we tried to keep back grilled vegetables for the vegetarians in the crowd, because everyone was going for them.”
One of Kirk’s coming projects is a cookbook he’s writing about what grand champions grill for their families in their own backyards. “You never know,” he says, “There could be a vegetarian recipe or two in the book.”

Keep up with Kirk at baron-of-bbq.com.

Tofu and Grilled Vegetable Stackers With Rainbow Tomato Relish

Makes 6 open-faced sandwiches

Rainbow Tomato Relish:
2 pounds (about 12) Roma tomatoes, halved lengthwise, core and seeds removed
1/2 cup extra-virgin olive oil, divided
1 teaspoon salt, divided
1/2 teaspoon pepper, divided
1 red bell pepper
1 orange bell pepper
1 yellow bell pepper
2 large cloves garlic, pressed
2 tablespoons finely minced basil leaves
2 tablespoons finely minced chives

Tofu Stackers:
Juice of 2 lemons
1 teaspoon crushed red pepper flakes
1 teaspoon cracked black pepper
1 teaspoon coarse kosher or sea salt
Zest of 1 lemon
6 garlic cloves, minced
1/2 cup coarsely chopped fresh basil
2 tablespoons minced fresh parsley
2 tablespoons minced fresh cilantro
2 tablespoons fresh dill weed
2 tablespoons fresh oregano leaves
1 cup extra-virgin olive oil
1 (18-ounce) block extra firm tofu, well pressed, cut into 18 equal pieces
1 (6-ounce) 6-count package baby bella mushroom stuffer caps, cleaned
1 small eggplant, peeled and cut into 12 equal pieces
1 zucchini, cleaned and sliced into 12 equal coin-sized pieces
1 yellow squash, cleaned and sliced into 12 equal coin-sized pieces

Sandwiches:
6 slices freshly sliced Italian bread
6 large cloves garlic, peeled

To prepare the Rainbow Tomato Relish:
Preheat oven to 450 degrees or grill to a medium heat of 350 degrees.
Place tomatoes into a large glass mixing bowl. Pour 1/4 cup olive oil over all and season with 1/2 teaspoon salt and 1/4 teaspoon pepper. Gently stir to coat. Place tomatoes, cut-side down, onto a baking sheet lined with parchment paper. Roast for 25 to 30 minutes, until tomatoes are soft and begin to caramelize. (Tomatoes can also be placed on grill and browned on both sides.) Dice tomatoes and return to glass mixing bowl. Set aside.
Place peppers, one by one, on the flame of a grill or gas stove. When the skins start to make popping sounds and blister, flip pepper over and repeat process on the other side. When peppers are evenly charred, immediately place each into a small brown paper bag, seal shut and allow to steam. Allow peppers to steam for at least 10 minutes or until the skin peels off easily.

Remove skin from each pepper, cut in half and remove veins and seeds from inside. Cut peppers into bite-sized pieces and place into large glass mixing bowl with tomatoes.
In a smaller mixing bowl, whisk remaining 1/4 cup olive oil with garlic, basil and chives. Season with remaining 1/2 teaspoon salt and 1/4 teaspoon pepper. Pour over tomato/pepper mixture and gently toss to coat. Tightly cover with lid or plastic wrap and place in refrigerator to chill for 4 hours, or overnight.

To prepare Tofu Stackers: In a glass mixing bowl, whisk lemon juice, red pepper flakes, cracked pepper and salt together until the salt dissolves. Whisk lemon zest, garlic, basil, parsley, cilantro, dill weed and oregano into lemony mixture. While whisking, slowly pour olive oil into mixture to create an emulsion. Set aside.

Place cut tofu into a large resealable plastic bag and pour one-third of prepared marinade over all. Seal bag, removing as much air as possible, and place in refrigerator to marinate 3 to 4 hours, or overnight.
Place cut vegetables into a separate resealable plastic bag and pour remaining prepared marinade over all. Seal bag, removing as much air as possible, and place in refrigerator to marinate 3 to 4 hours, or overnight.

After marinating the ingredients, prepare a medium fire on the grill. Remove tofu and vegetables from the marinade. Discard tofu marinade, but reserve liquid from vegetables for basting.
Place tofu and mushrooms on grill first, then eggplant and finish with squash and zucchini, basting as desired. Grill tofu and vegetables on both sides, until desired doneness is achieved. As tofu and vegetables are finished grilling, place into a warming dish until ready to serve.

To assemble sandwiches: On the grill, toast bread on both sides. As warm bread comes off the grill, rub garlic clove vigorously, but not too hard, over both sides of bread. Place 1 piece of garlic-infused bread on each of 6 plates. Place 3 pieces of tofu on each slice and top each with tomato relish. Skewer grilled vegetables with a rosemary sprig and garnish sandwich.

Per sandwich: 582 calories (53 percent of calories from fat), 35 grams total fat (5 grams saturated), no cholesterol, 57 grams carbohydrates, 14 grams protein, 893 milligrams sodium, 7 grams dietary fiber.

Photo taken at Smoke’n’Fire Home of Xtreme BBQ in Overland Park.

Sunday, March 4, 2012

BBQ Class: Learning From A Master

BBQ Class: Learning From A Master


One of the earliest cookbooks I purchased that was completely barbecue related was Paul Kirk’s Championship Barbecue Sauces. It’s still one of my favorites and one I turn to often.

One of the reasons I enjoy Paul’s book is that it’s not just a “here’s a recipe – make it,” cookbook. This book is much more of a teaching and motivational cookbook. Yes, I can call him Paul. We’ve known each other for years. I, along with Matt Fisher and Andrew Fischel of RUB brought Paul to NYC way back on October 21, 2006 for his first ever cooking class in New York

Chef Kirk comes to the forefront in this book. Chef Paul the mentor is ever present on every page. While he does provide “recipes” a lot of the book is dedicated to technique. He provides a list of ingredients and then walks you through the steps to create. What flavors work together? Which oppose each other. How do you get the combination that achieves the flavor profile your’e seeking? This book walks you through all of that and it’s very much how Paul teaches his class.

When Paul was in NYC back in 2006, Matt and I teamed up to create a rub that would be used throughout the class on chicken, ribs and pork shoulder. Paul opened up his magic spice rack and laid out about 70 different herbs, spices, salts and peppers for us to taste. After tasting the spices, we started to devise a rub. The first task was to put it all down on paper. We had to write out precise measurements of each seasoning we were going to use. Once that was done, Paul would critique each creation.

Matt and I approached the Baron of Barbecue and waited in anticipation for Paul’s comments. He read over the list, which I wish I Still had, and made a couple of recommendations, “add more of this.” or “loose that.” But one line stayed with me to this day, “You Yankees sure love your Bay. It’s not a barbecue spice and I wouldn’t use it, but hey, it’s your rub.”

A little disappointed with the Baron’s comments, Matt and I returned to our table and mulled over Paul’s remarks. Matt and I mulled it over for a while, should we take out the Bay (ground dried bay leaf)? I like the flavor of Bay. Matt liked the flavor of Bay. We went back and forth with it for about 15 minutes before we finally said “Fuck it. Leave it in.” We mixed up the rub, tasted it and were pretty please with ourselves.

So we mix up the rub, season up some ribs and smoke them. Nervously we present a rack of ribs to Paul for review. He looks at them and declares them under-cooked. (Let me explain something here. He didn’t mean that they were still raw. He meant that they hadn’t reach that perfect spot where you could bend the rack together so that the ends almost touch, without the meat breaking.) Paul took a couple of bites, said the rib had a good texture. He put the rib down, wiped his hands and mouth and finally declared, “Pretty good rub.”

Even with expert advice, sometimes it’s best to just follow your gut. Matt and I defied the advice of the Baron of Barbecue and created a rub that pleased even him. Trust your instincts. I remember another time in creating a rub where I added ground up chocolate sprinkles. Damn that was a good rub. The chocolate added just the perfect amount of depth that rub needed.

So what’s the moral of this story? Go – play with your food.

Tuesday, February 7, 2012

RUB BBQ: Lovers of the ’cue can regain a sense of down-home at this Chelsea locale


No bones about it, New York is not a barbecue town. Don’t let poser pit crews in their PR outfits bamboozle you with lies.

If there is good barbecue to be had in this city, it has been removed from its natural habitat. Like a Texas cowboy come to New York to prostitute his body, barbecue gone North has been estranged from its essential self. Barbecue is about knowable communal activities—gathering ’round the smoker, taking shifts turning the coals, putting together parish-wide buffets and picnics. It is an art of the countryside, a vestigial organ of the American pastoral, a wild sentiment domesticated in the suburbs, a real figment of the American moral imagination, a rural fantasy made material. It is a Gary Snyderian experience—like a smoke haze, three days of heat after five days of rain, swarms of new flies, drinking cold snow-water from a tin cup. It is anathema to the soot and despair of city living.
In New York, the barbecue restaurant invokes country living but, in the end, everything feels too smoothed and polished, too damn commercial. When I eat at Hill Country or Dinosaur Bar-B-Que or Blue Smoke, I enter with the wrong expectations and leave disappointed. The only way to enjoy New York barbecue, as it has been institutionalized, is to expect Universal Studios and smile, anesthetized, at ugly food and people at their ugliest.

If I had a dollar for every bad rib I’ve eaten here and every time I had dinner while people sat there drunk, I’d catch the next train back to where I live. I grew up in St. Louis, where barbecue happens in backyards. We threw down pork shoulders in oil can smokers and brewed sauce in big kettles. An authentic and genuine barbecue experience requires the “we,” the instantiation of creative energy in a communal task. Barbecue must be a live issue for the people involved: It must always really matter. That is why RUB BBQ is my favorite restaurant in New York. RUB is New York’s only sincere barbecue joint, the only spot where the anonymity of city life slips into an ecstatic rejoinder of recognition.

In 2005, Andrew Fischel started RUB BBQ. It’s half-acronym—the name means “Righteous Urban Barbecue.” Executive Chef Paul Kirk is in the Barbecue Hall of Fame, which is all you need to know about the quality of ’cue coming out of the kitchen.

Current Pit Master Scott Smith keeps the RUB smoker moving smoothly. He has the touch of a master craftsman. I imagine his hands are supple from stroking many sides of pastrami. He certainly has quite a way with a rack of ribs.

Although you can eat your way down the menu without any prior preparation, a savvy ’cue connoisseur approaches a visit to RUB as a question of strategy. It’s imperative to arrive early in the evening. RUB cooks a discrete quantity of meat each day, so it tends to run out of more popular menu items (burnt ends, I’m talking about you). Go with a good group. I define a good group as four fellow meat eaters, all without qualms about finger sucking or otherwise insanitary food sharing practices. Order meat by the pound and sides in the large size. Eat until you feel ill, then eat until it feels good again.

False prophets preach of “fall-off-the-bone” ribs. RUB’s ribs adhere to the competition standard: meat that yields without resistance to the tooth but remains attached to the bone.
Pulled pork, drizzled with RUB’s tangy house sauce, makes a nice sandwich folded up in white bread with pickles. Or try the pastrami, moist and smoky like a Turkish bath. It, like in “Portnoy’s Complaint,” speaks “of prehistoric times, earlier even than the era of the cavemen and lake dwellers that I have studied in school, a time when above the oozing bog that was the earth, swirling white gasses choked out the sunlight and aeons passed while the planet was drained for Man.”
As for side dishes—don’t miss the beans. They’re the most sublime legumes ever tasted—and, contrary to Pythagoras’ advice, I’ve eaten many a baked or barbecued bean in my time.
Burnt ends, though, are the best thing to eat at RUB. They are Satan’s McNuggets. They are little charred parcels of sweet beef fat and pink brisket. They are psychotropic: eyes-rolling-back-in-your-head-foaming-at-the-mouth crazy delicious. During live performances of “Born to Run,” Clarence Clemons (may he rest in peace) would, at the song’s climax, cover Bruce Springsteen’s ears as though to protect him from the wall of sound. Experiences of such profound and excessive beauty are too much for the human body to bear.

What is the purpose, the vocation, the destiny of RUB in the universe of New York barbecue? As Springsteen once evangelized: “To reeducate ya to resuscitate ya to regenerate ya to reconfiscate ya to recombobulate ya to reindoctrinate ya to resexualate ya to rededicate ya to reliberate ya, with the power and the glory with the power and the glory with the promise with the majesty with the mystery with the ministry of...” barbecue.

I came into town, a one night stand—looks like my plans fell through. Oh, Lord, stuck in New York again. At least I finally found a barbecue spot that reminds me of home. RUB cannot replicate barbecue’s native ecology. It does, however, come close enough to provoke a real reflex of pleasure. Cue gratuitous fist pumping, shirt waving, crawling over security guards onto the smoker to swipe a single drop of holy sweat, a variety of religious experience in no way inferior to pure rapture.

Monday, January 23, 2012

Warning: Measure Your Salt

Warning: Measure Your Salt

salt
Tony Cenicola/The New York Times


I was a Diamond Crystal baby. Diamond Crystal kosher salt was the only salt my mother used, the only one I knew as a child. Now, half a century later (yikes!), it remains the salt I reach for first — although I now have to fish for it among half a dozen that sit on the shelf. All those fancy sea salts, however, are used to finish dishes or added at the table, where their varied textures are a source of tactile delight. For cooking, I rarely use anything but the kosher salt of my childhood; I can judge, by eye and by feel, how much I need for any task from making a well balanced vinaigrette to seasoning a steak.

I always knew that Diamond Crystal was far less dense than table salt and that it was easily crushed between the fingers. I had a vague idea that these qualities resulted from the unusual shape and fragility of the crystals. The shape meant that in each handful, tablespoonful or pinch there was more space between grains of salt — hence, less salt. The fragility meant that a quick rub of the thumb and forefinger could “grind” the salt for, let’s say, quicker dissolving.

I’d always assumed that other kosher salts were the same. But one day, my supermarket ran out of the Old Reliable and I bought a box of Morton’s. Suddenly, I lost my knack for getting the salt spot-on: everything was oversalted. Everything. Pound cake tasted like something you might serve with pot roast, and pot roast tasted like the barrel-preserved meat served on HMS Bounty. For heaven’s sake, the spaghetti was too salty — I was over-dosing the pasta water.

Even when I figured out what was going on, I couldn’t get it right, which is an interesting if somewhat depressing reflection on the force of habit. And what was going on was this: Morton’s kosher salt is made by a different process, and each unit of volume (cup, teaspoonful, etc.) weighs nearly twice as much as the equivalent volume of Diamond Crystal — and hence contains nearly twice as much salt.
Ordinary table salt is typically made by taking the water out of brine in a series of evaporating pans; its crystals are cubic in shape (remember looking at it through a microscope in science class?). To manufacture its kosher salt, Morton’s runs such salt between rollers, which results in a thin, coarse flake.

By contrast, Diamond Crystal kosher salt is made using a particular open pan evaporating method (the Alberger method, just so you know) which results in handsome hollow pyramid-shaped grains. This hollow structure accounts for the salt’s lightness, and the thin walls of the “pyramids” for its crushability.

So I got out a one-cup measure and a scale, and I weighed similar volumes of Morton’s and Diamond Crystal kosher salts, plus regular table salt, generic coarse sea salt and Malden sea salt from England (included for no reason other than that I think it is the most beautiful of salts). Here’s the outcome, rounded off to the nearest five grams or eighth of an ounce (no, this is not a scientific inquiry):

Morton’s kosher: 250 grams (8 3/4 ounces)
Diamond Crystal kosher: 135 grams (4 3/4 ounces)
Table salt: 300 grams (10 5/8 ounces)
Coarse sea salt: 210 grams (7 3/8 ounces)
Malden sea salt: 120 grams (4 1/4 ounces)

It is the first three figures that we need to pay attention to, because those are the salts we’re most likely to use in our cooking and baking. We learn from them that a tablespoon of Morton’s kosher salt is the equivalent of 1.85 tablespoons of Diamond Crystal — just half a teaspoon shy of 2 tablespoons. We learn that a tablespoon of table salt can be replaced by 2 1/4 tablespoons of Diamond Crystal kosher salt or 1 1/4 tablespoons of Morton’s.

We learn that whenever recipe writers are rash enough to give a precise measurement for salt, they ought to specify what kind they’re talking about. Some do; but even then, some just say “kosher salt” — I’ve done this myself, but I’ve stopped, and I promise never to do it again.

Most important, we learn to add salt with circumspection and to taste at every step of the way. But we all knew that anyway. Didn’t we?